Changing a uPVC door lock starts with identifying which part actually needs replacing. If you need new keys, you may only need to change the euro cylinder. Loose or damaged handles require a compatible handle set, while locking points that fail to move may indicate a problem with the gearbox or multipoint mechanism.
A cylinder change is usually the simplest job. Replacing the handles requires additional measurements, and changing a multipoint mechanism involves identifying the exact system fitted along the door edge.
This Locksmith Birmingham guide explains how to identify the faulty part, take the correct measurements and replace the cylinder, handles or multipoint mechanism. It also covers testing, common fitting problems and when to stop and call a locksmith. Only continue if the door opens safely and no part requires force.
How to Choose and Measure the Correct Replacement
The replacement part must fit the existing door and work with the hardware that will remain in place. Measure the cylinder, handles or multipoint mechanism before ordering. Do not choose a replacement based only on its appearance or brand.
How to Measure a Euro Cylinder
Euro cylinders are measured in two parts from the centre of the retaining-screw hole. A cylinder marked 40/50 mm measures 40 mm on one side and 50 mm on the other.
You can measure the required size while the cylinder is fitted:
- Open the door and locate the cylinder retaining screw on the metal faceplate. It is usually level with the cylinder.
- Measure from the centre of that screw to the outside face of the external handle or security escutcheon.
- Measure from the same point to the inside face of the door furniture.
- Record the two measurements separately.
- Mark which measurement faces outside.
You can also remove the existing cylinder and measure from the centre of its retaining-screw hole to each end. However, do not copy its size automatically if it already projects too far or sits too deeply within the handles.
Before ordering, confirm:
- The internal and external measurements
- Which end of the cylinder faces outside
- Whether you need a key on both sides or an internal thumbturn
- How the cylinder will sit against the handles or escutcheons
Do not round the measurements up or down without checking the available sizes and finished position.
How to Measure uPVC Door Handles
uPVC door handles may look similar but have different fixing positions and operating arrangements.
Measure and record:
- Handle-to-cylinder centres: Measure from the centre of the square handle spindle to the centre of the cylinder. This is often called the PZ measurement.
- Fixing-screw positions: Measure between the centres of the upper and lower fixing screws. Record where each screw sits in relation to the spindle and cylinder.
- Backplate size: Measure the total length and width of the handle plate.
- Spindle: Record the size and required length of the square bar joining the handles.
- Handle arrangement: Check whether both sides have movable levers or the outside uses a fixed pad.
Measure from centre to centre rather than from the edges of the holes. A handle set with the correct PZ measurement may still be unsuitable if its screws, spindle or operating arrangement do not match the existing gearbox.
How to Identify a Multipoint Locking Mechanism
A multipoint mechanism has a central gearbox and a metal strip running along the door edge. It may operate hooks, rollers, mushrooms, bolts or a combination of locking points.
Before ordering a replacement, record:
- Manufacturer name and identification numbers
- Faceplate width and shape
- Backset from the faceplate to the spindle centre
- PZ measurement between the spindle and cylinder
- Overall length of the metal strip
- Type and position of every locking point
- Gearbox dimensions and screw positions
- Lever-lever, lever-pad or split-spindle operation
Photograph the complete door edge, gearbox area and every visible marking before removing anything.
Do not assume that two mechanisms are compatible because they share a brand or look similar. Do not cut a replacement strip unless its manufacturer confirms that it can be shortened.
Removing the mechanism may leave the door unsecured. Confirm the likely replacement first or arrange the work for a time when the entrance can remain open and supervised.
Choosing the Right Security Level
A correctly sized cylinder must also provide suitable protection for the entrance. An “anti-snap” description alone does not confirm that a product has passed a recognised security test.
TS 007 protection can be achieved with either:
- A TS 007 Kitemarked three-star cylinder
- A TS 007 Kitemarked one-star cylinder combined with TS 007 Kitemarked two-star protective hardware
These ratings apply to the cylinder and protective hardware. They do not certify the complete door or multipoint mechanism.
Our guide to anti-snap locks and TS 007 ratings explains what the markings mean.
How to Change a uPVC Door Lock Barrel
Changing a euro-cylinder barrel usually requires a suitable screwdriver, a correctly sized replacement cylinder and a working key for the existing lock.
Only follow these steps if the door opens normally. Keep it open throughout the replacement and initial testing.
Step 1: Find the Cylinder Retaining Screw
Open the door and look at the metal faceplate running along its edge.
Find the screw positioned in line with the cylinder. This is usually longer than the screws holding the multipoint strip to the door.
Make sure you have identified the correct screw before removing it.
Step 2: Remove the Retaining Screw
Use a suitable screwdriver to remove the cylinder retaining screw completely. Keep it somewhere safe.
Do not remove the other screws securing the multipoint strip. If the handle plate or escutcheon blocks the cylinder, loosen its own fixings instead.
If the retaining screw is damaged or incompatible with the new cylinder, use the correct screw supplied or specified for the replacement.
Step 3: Align the Cam and Remove the Old Cylinder
Insert the working key into the old cylinder.
Turn the key slightly to the left or right. This aligns the central cam with the cylinder body.
While holding the key in that position, grip the cylinder where possible and draw it out gently. Adjust the key by a small amount if the cylinder does not slide free.
Do not pull hard on the key or use it as a lever. If the cylinder remains stuck, check that:
- The retaining screw is fully removed
- The cam is aligned
- The handle plate is not trapping the cylinder
- The cylinder is not damaged or distorted
Stop if removal requires force.
Step 4: Insert the New Cylinder
Check which end of the new cylinder faces outside. Make sure an internal thumbturn is positioned on the inside.
Insert the new key and turn it slightly to align the cam. Slide the cylinder gently into the opening.
Move the key by a small amount until the cylinder sits fully in position. It should slide into place without being pushed or forced.
If it catches, remove it and check the size, orientation and cam position.
Step 5: Secure the Cylinder
Align the threaded hole in the cylinder with the retaining-screw opening on the door edge.
Insert the correct screw and tighten it until the cylinder is secure. Do not overtighten it.
Check that the cylinder:
- Does not move within the door
- Sits correctly inside the handle plates
- Does not project unnecessarily on the outside
- Allows the key to enter and turn without binding
If tightening the screw makes the key stiff, loosen it and recheck the cylinder position.
Step 6: Test the Lock With the Door Open
Keep the door open while completing the first test.
- Insert and remove the key from both sides, or test the internal thumbturn.
- Operate the key according to the door’s normal locking sequence.
- Lift and lower the handle where required.
- Check that the hooks, rollers and bolts extend and retract.
- Test every key supplied with the cylinder.
- Fully retract every locking point before moving the door towards the frame.
Follow the manufacturer’s instructions if the mechanism has a trigger or a different testing procedure.
Step 7: Test the Lock With the Door Closed
Bring the door gently towards the frame without locking it. Check that it closes naturally and that the latch meets the keep correctly.
Close the door and operate the handle and key without applying force.
If the lock works while open but becomes stiff when closed, check the hinges, keeps and door alignment. If it remains stiff while open, recheck the cylinder size, fitting and compatibility before using the door.
How to Replace uPVC Door Handles
Replace the handles when the problem is limited to the handle set, spindle or handle springs. New handles will not repair a failed gearbox or correct a misaligned door.
You will need a suitable screwdriver, a compatible handle set and the correct spindle and fixing screws. Keep the door open throughout the replacement and initial testing.
Step 1: Compare the New and Existing Handles
Before removing the old handles, check that the replacement set matches:
- Handle-to-cylinder centres, also called the PZ measurement
- Upper and lower fixing-screw positions
- Backplate length and width
- Spindle size and required length
- Door thickness
- Lever-lever or lever-pad operation
- Internal and external handle positions
Check each fixing-screw position rather than relying only on the distance between the screws. A handle set with the correct PZ measurement may still be unsuitable if its screws interfere with the cylinder or gearbox.
For a lever-pad or split-spindle system, confirm that the replacement will preserve the existing method of opening the door.
Step 2: Remove the Existing Handles
Open the door and support the handle on the outside.
Remove the fixing screws from the internal handle plate. Hold both handles as the screws come out so the external handle does not fall.
Pull the handle plates away from the door and remove the spindle. Keep the old handles, spindle and screws together until the replacement has been fitted and tested.
The cylinder can normally remain fitted. Remove it first if it prevents the handle plates from coming away or if the protective furniture is designed around it.
Step 3: Check the Spindle and Fixings
Inspect the old spindle for visible wear, bending or damage. Compare it with the spindle supplied with the new handles.
Use only a spindle that:
- Fits the gearbox follower correctly
- Reaches both handles
- Does not project excessively
- Preserves the existing handle operation
Check the fixing-screw lengths against the door thickness. Screws that are too long may contact or damage the gearbox.
Only shorten supplied screws when the handle manufacturer permits it. Do not force a screw that does not align or tighten normally.
Step 4: Fit the Replacement Handles
Pass the correct spindle through the gearbox.
Hold the external handle against the door. Position the internal handle over the spindle and align the fixing holes.
Insert the correct screws and tighten them evenly. Alternate between the screws rather than fully tightening one first.
The backplates should sit flat against the door without bending. The handles should move freely without rubbing against the plates.
Step 5: Test the Handles With the Door Open
Move the handles several times while the door remains open.
Check that:
- The latch retracts completely
- Both handles move correctly
- The handles return to their normal position
- The spindle operates the gearbox
- The hooks, rollers and bolts extend and retract
- Every locking point is fully retracted after testing
If the handles become stiff after the screws are tightened, loosen the screws slightly and check the alignment. Do not continue tightening them to pull a misaligned handle into position.
If the handle still droops or fails to move the locking points, the fault may be inside the gearbox rather than the handle set.
Step 6: Test the Handles With the Door Closed
Bring the door gently towards the frame and check that the latch enters its keep without resistance.
Close the door and operate the handle and key normally. Do not lift the handle or turn the key with excessive force.
If the handles work while the door is open but become stiff when it is closed, the hinges, keeps or door alignment may need attention. Further guidance is available for uPVC door lock and alignment problems.
uPVC Door Lock Help in Birmingham
Not Sure Which Part of Your uPVC Lock Has Failed?
Tell us your postcode, what happens when you use the key and handle, and any markings you can see. We will discuss the likely work and price before arranging a visit.
How to Replace a uPVC Multipoint Locking Mechanism
A multipoint mechanism must match the gearbox, faceplate and locking-point layout used by the door. Similar-looking mechanisms are not necessarily interchangeable.
Only attempt replacement when the door is open and the hooks, rollers and bolts can be retracted. Stop if the door is locked shut or the locking points remain trapped inside the frame.
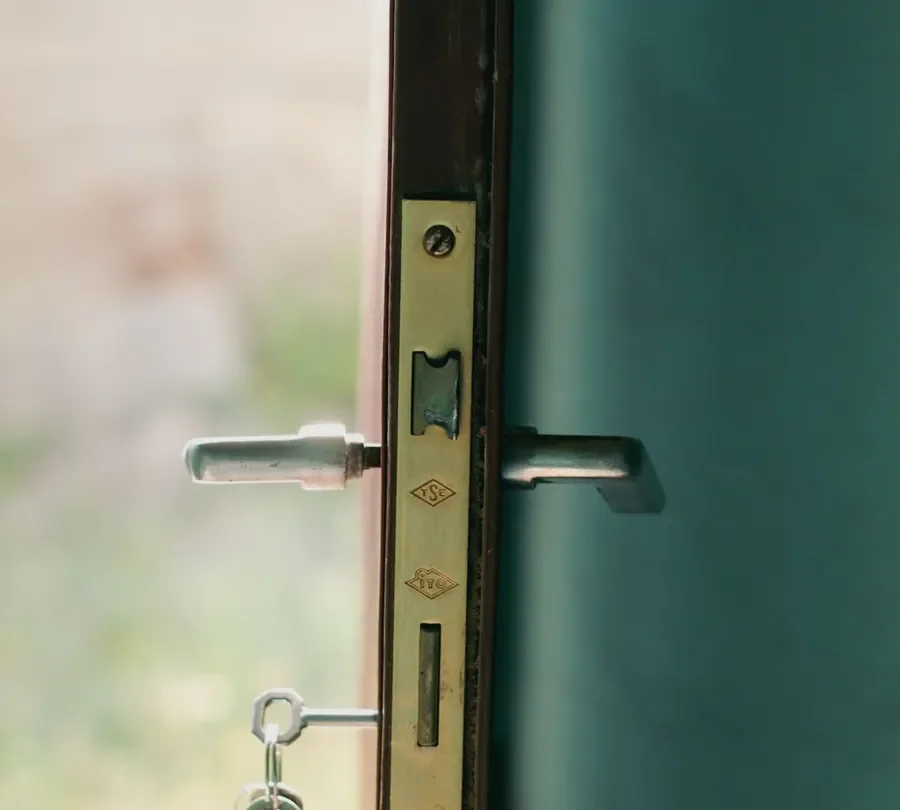
Step 1: Record the Existing Mechanism
Record as much information as possible before removing the mechanism:
- Manufacturer name and identification numbers
- Faceplate width and shape
- Backset
- Handle-to-cylinder centres
- Gearbox dimensions
- Overall strip length
- Hook, roller and bolt positions
- Spindle and handle operation
- Latch direction
Photograph the complete door edge, gearbox area and every visible marking.
Some details may only become visible after removal. Make sure the entrance can remain open and supervised while you confirm the replacement.
Step 2: Retract the Locking Points
Open the door and use the handle and key to retract every hook, roller and bolt.
Inspect the complete door edge before continuing. Do not remove the mechanism while a locking point remains extended.
Keep the door open and supported throughout the work.
Step 3: Remove the Cylinder and Handles
Remove the euro cylinder using the barrel-removal steps covered earlier.
Support both handles and remove their fixing screws. Pull the handles away from the door and remove the spindle.
Keep the cylinder, handles, spindle and fixings organised so you know where each part belongs during reassembly.
Step 4: Remove the Multipoint Strip
Remove the screws securing the metal faceplate to the door edge. Work along the strip while supporting it.
Once every fixing has been removed, draw the mechanism straight out of the door channel.
Do not bend the faceplate or pull on the hooks and rollers. If the mechanism catches, check for a missed fixing screw rather than prising it from the door.
Step 5: Compare the Old and Replacement Mechanisms
Place both mechanisms side by side and compare:
- Gearbox and spindle positions
- Cylinder opening
- Faceplate width and profile
- Screw holes
- Overall strip length
- Hook, roller and bolt positions
- Latch direction
- Top and bottom end positions
- Handle and spindle operation
If the replacement latch faces the wrong direction, reverse it only when the manufacturer confirms that it is designed to be changed.
Some locking strips may be shortened at marked cutting points. Do not cut through a drive bar, gearbox or locking point. Do not modify the strip unless the manufacturer supplies instructions for doing so.
An alternative replacement may position its locking points differently. If they do not match the existing frame keeps, the keeps may also require replacement or adjustment.
Step 6: Fit the Replacement Mechanism
Place the mechanism into the door channel without forcing it. Check that the latch faces the correct direction and that the gearbox aligns with the handle and cylinder openings.
Insert the correct faceplate screws loosely. Once the strip sits flat and straight, tighten them evenly.
Do not use screws that are damaged, excessively long or likely to interfere with the mechanism inside the door. Do not overtighten the screws or distort the faceplate.
Follow the replacement manufacturer’s instructions if its fitting procedure differs.
Step 7: Refit the Handles and Cylinder
Insert the correct spindle through the gearbox and position the handles on both sides of the door.
Fit the handle screws and tighten them evenly. Reinstall the correctly oriented cylinder and secure it with the appropriate retaining screw.
Check that the handles, spindle and cylinder sit correctly before operating the mechanism.
Step 8: Test the Mechanism With the Door Open
Complete the first test while the door remains open:
- Move the handles gently.
- Check that the latch retracts and releases.
- Extend and retract every hook, roller and bolt.
- Operate the key or thumbturn using the normal locking sequence.
- Check that the handles return correctly.
- Fully retract every locking point.
Follow the manufacturer’s instructions if the mechanism has an automatic locking feature or trigger.
Step 9: Check the Frame Alignment
Bring the door carefully towards the frame without locking it. Check that the latch and every locking point align with their keeps.
Close the door and operate the mechanism gently. Do not force a hook, roller or bolt into a keep that does not align.
If the mechanism operates correctly while open but becomes stiff when closed, the door or frame keeps may require adjustment.
Can the Gearbox Be Replaced Separately?
Some multipoint systems allow the central gearbox to be replaced without changing the complete locking strip.
The replacement gearbox must match:
- Backset
- Handle-to-cylinder centres
- Spindle operation
- Fixing positions
- Connections to the locking strip
Replace the complete mechanism when a compatible gearbox is unavailable or the strip and locking points are also worn or damaged. An inspection can help determine whether repairing or replacing the lock is more appropriate.
Stop and request professional help if:
- You cannot identify a compatible replacement.
- The locking points do not align with the frame.
- The faceplate or door would need drilling or alteration.
- The gearbox does not connect correctly to the handles or cylinder.
- The property cannot remain secure during the work.
- The entrance is a fire door, communal door or managed flat entrance.
What to Check if the New Lock Does Not Work Properly
A newly fitted cylinder, handle set or multipoint mechanism should operate smoothly without excessive pressure. If it does not, keep the door open and recheck the part, measurements and fitting before closing or locking it.
Do not assume that a stiff new component simply needs to “wear in.” Forcing it can damage the replacement or another part of the locking system.
The New Cylinder Will Not Fit or Turn
If the cylinder will not slide fully into place, check:
- The cam is aligned with the cylinder body.
- The internal and external sides are positioned correctly.
- The cylinder has the correct measurements.
- The retaining screw has been removed completely.
- The handle plate or escutcheon is not obstructing it.
- Nothing is damaged or trapped inside the cylinder opening.
If the cylinder fits but the key becomes stiff after the retaining screw is tightened, loosen the screw and check the cylinder position. The screw should hold the cylinder securely without pulling it out of alignment.
Do not modify the cylinder, force the key or enlarge the opening to make an unsuitable replacement fit.
The New Handle Droops or Feels Stiff
A replacement handle may droop, bind or fail to return when:
- The spindle is the wrong length or size.
- The handle plates are not aligned.
- The fixing screws have been tightened unevenly.
- An overlong screw is interfering with the gearbox.
- The handle set does not match the existing operation.
- The gearbox or latch has an internal fault.
Loosen the handle screws slightly and check that both backplates sit flat. Confirm that the spindle engages both handles and the gearbox correctly.
If the handle moves normally before the screws are tightened but becomes stiff afterwards, recheck the screw lengths and handle alignment.
The Handle Moves but the Locking Points Do Not
If the handle moves but the hooks, rollers or bolts remain still, the spindle may not be engaging the gearbox. The problem could also involve an incompatible handle arrangement or a failed gearbox.
Keep the door open and check that:
- The spindle passes fully through the gearbox follower.
- The spindle is not rounded, bent or too short.
- The handle set uses the correct lever or split-spindle arrangement.
- The gearbox responds without slipping or unusual movement.
Do not repeatedly lift the handle if the locking points do not respond. Continued movement may worsen an internal gearbox fault.
The Multipoint Strip Will Not Sit Flat
A replacement strip should fit into the existing door channel without being bent or forced.
If it will not sit correctly, check:
- The faceplate width and profile
- Gearbox dimensions and position
- Screw-hole locations
- Latch direction
- Overall strip length
- Any permitted cutting points
- Obstructions inside the door channel
Do not use the faceplate screws to pull a poorly fitting strip into position. This can distort the mechanism or damage the uPVC profile.
The Lock Works Open but Not Closed
If the lock operates correctly with the door open but becomes stiff when closed, the replacement component may not be the main problem.
Check whether:
- The door has dropped on its hinges.
- The latch catches the edge of its keep.
- Hooks, rollers or bolts meet the keeps incorrectly.
- The frame has moved.
- Seals or surrounding hardware are placing pressure on the door.
- Replacement locking points differ from the original arrangement.
Do not adjust frame keeps until the door and hinges have been checked. Moving the keeps to compensate for a dropped door may hide the cause without correcting it.
The Lock Remains Stiff With the Door Open
If the problem continues while the door is open, recheck the fitted component.
Possible causes include:
- Incorrect cylinder size or orientation
- A binding retaining screw
- Misaligned handle plates
- An incompatible spindle
- Incorrect gearbox or multipoint mechanism
- Damage elsewhere in the locking system
Remove and refit the replacement only if the cause is clear and the door can remain secure. Otherwise, stop before further parts are damaged.
When Should You Stop and Call a Locksmith?
Stop the replacement if the door cannot remain open and secure, the correct component cannot be identified or any part requires force. Continuing with an uncertain repair can turn a replaceable component into damage affecting the door, frame or complete locking system.
Professional inspection is appropriate when:
- The door is locked shut.
- The key has broken inside the cylinder.
- No working key is available to remove the barrel normally.
- The handle moves but the locking points remain engaged.
- The cylinder, gearbox or locking strip cannot be identified confidently.
- A replacement part does not align with the existing hardware.
- The door cannot be locked after fitting.
- The faceplate or door would need drilling, cutting or alteration.
- Several components appear worn or damaged.
- The entrance has been damaged during a break-in.
- The door is a fire door, communal entrance or managed flat entrance.
- The property would remain unsecured if the work continued.
A broken key does not always mean the cylinder needs replacing. If the broken section can be removed and the lock remains undamaged, professional key extraction may preserve the existing lock.
When requesting help, explain:
- Whether the door is open, closed or locked shut
- Whether the property can currently be secured
- What happens when you use the key and handle
- Which part has already been removed or replaced
- Any markings visible on the cylinder, handles or faceplate
- Your Birmingham postcode
Clear photographs of the handles, door edge, faceplate and visible markings can help identify the system. For help with a failed mechanism or an uncertain replacement, you can ask about a uPVC door lock inspection before removing further components.
Check the Complete Lock Before Closing the Door
Changing a uPVC door lock starts with identifying the correct component. Replace the euro cylinder when you need new keys or the barrel is faulty. Change the handles when the problem is limited to the handle set or spindle. Replace the gearbox or multipoint mechanism only after confirming its measurements and locking-point arrangement.
Keep the door open while fitting and testing each part. The key, handles and locking points should move smoothly without force. If the lock works when open but becomes stiff when closed, check the door alignment, hinges and frame keeps before replacing more hardware.
If the correct part is unclear or the door cannot be secured, send your lock details to our Birmingham team. Include your postcode and clear photographs of the handles, door edge and visible markings so the likely next step can be discussed.
uPVC Lock Replacement
Need a Cylinder, Handle or Multipoint Mechanism Replaced?
Call with your postcode and a short description of the door. We will explain the options and the expected price before attendance.
Frequently Asked Questions About Changing uPVC Door Locks
Can I change a uPVC door lock without the original key?
Not by the standard DIY cylinder-removal method in most cases. A working key is normally needed to align the cylinder cam. If no key is available, professional removal may be required.
Can I change a uPVC door lock if the door will not open?
Do not follow the standard replacement steps while the door is locked shut. The cylinder, handles and multipoint strip are normally removed with the door open. Avoid forcing or dismantling the lock while its locking points remain engaged in the frame.
How do I know whether the cylinder or gearbox has failed?
Use the symptom to decide what needs inspecting, but do not treat it as a confirmed diagnosis. A key that will not enter or turn may indicate a key or cylinder problem. If the key turns but the locking points do not respond, inspect the cylinder connection, spindle, gearbox and multipoint mechanism.
Can I replace the barrel without changing the multipoint mechanism?
Yes, a euro cylinder can normally be replaced separately. If the handles, gearbox and locking points operate correctly, changing the barrel may be enough when you need new keys or a security upgrade.
Do I need to remove the handles to change a euro cylinder?
Not usually. Most euro cylinders can be removed after taking out the retaining screw and aligning the cam with the key. The handle plates or protective furniture may need loosening if they obstruct the cylinder.
Are all uPVC door handles the same size?
No, uPVC door handles differ in their PZ centres, fixing positions, backplate dimensions, spindle arrangement and operation. Door thickness can also affect the required spindle and screw lengths, so measure the existing set before ordering.
Why does my uPVC door lock work when open but not closed?
This commonly points to resistance where the door and locking points meet the frame. The door may have dropped, the hinges may be worn or the latch, hooks and bolts may no longer align with their keeps.
Can I replace only the gearbox in a uPVC door lock?
Sometimes. The replacement gearbox must match the backset, PZ centres, spindle arrangement, fixings and connections to the locking strip. Replace the complete mechanism if the strip or other locking points are also worn or damaged.
Can I replace a multipoint lock with a different brand?
A different brand may be suitable if the replacement is designed as a compatible mechanism. Its gearbox, faceplate, measurements, operation and locking-point positions must match the door. Different locking points may also require changes to the frame keeps.
What happens if I fit the wrong-size euro cylinder?
A cylinder that is too long may project beyond the external protective furniture and leave more of it exposed. One that is too short may sit too deeply and make the key difficult to use. Measure the internal and external sides separately before ordering.
Do I need to replace the complete lock after losing my keys?
Not usually. If the euro cylinder controls the missing keys and the rest of the locking system works correctly, replacing that cylinder should prevent those keys from operating the door. Check whether any additional keyed locks also need attention.
Why is the new uPVC door handle still drooping?
The fault may involve the handle springs, spindle, fixing alignment or internal gearbox. Recheck the handle measurements and fitting with the door open. Do not assume that replacing the handle set will correct a gearbox fault.